A Group is designed to assist the administrator in limiting news or events to certain groups, for example you may only want to publish events or shifts to a group with a certain skill set or for a specific charity group. Create groups based on users geographical location, tertiary institution and more. Use the group manager navigate through your created groups, communicate with users and export to .xlsx for offline viewing. This functionality allows you to manage large groups in a simple and efficient way. Some examples of ways in which a Group can be used are listed below:
- Restrict shift access
- Communicate easily to select users
- Easily report on specific users
- View potential users for a role offer
- Export a list of users for offline viewing

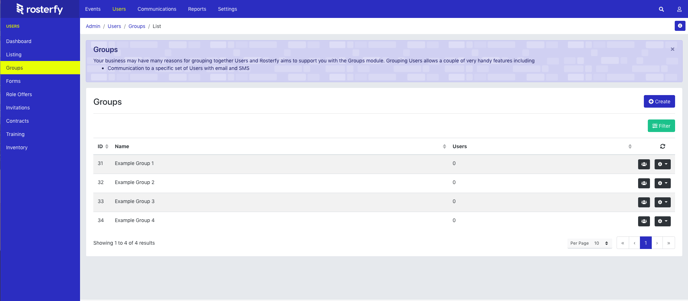
Within the group listing you are able to view the total amount of members within existing groups, filter existing groups by name, create a new group, or go into each group individually either to view the users or make updates.
To view all of the users in a certain group, click the account button By clicking the settings button, you will be able to either update or delete the group.
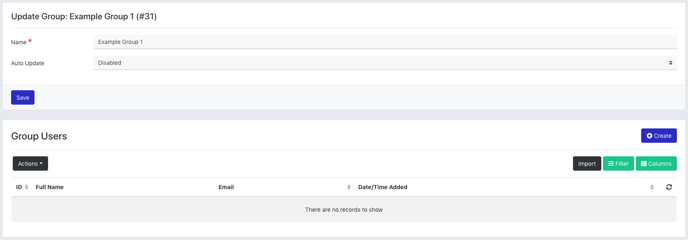
Once in a Group, you will see the following screen:

From here you can update the group name and whether or not it is an auto-update group.
In the Group Users section, you can:
- Create a group user to add a user to a group.
- Import users into the group.
- Filter the users in the group by first name, last name, or email.
- Update the columns displaying for the group users.
- Take group user actions.
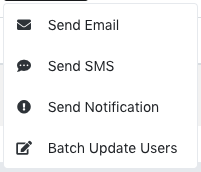
The available Group User Actions are:

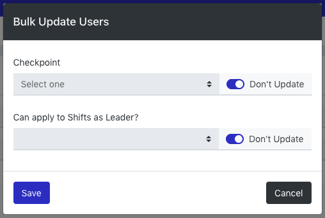
For batch updates, you are able to edit the users' checkpoint or if they can apply for shifts as a leader.

Once a group has been created you are also able to Import Users to shift to add Users in bulk to shifts automatically or when you choose. There is also the option to control what shifts are available to Users by using the Group shift filter on Event settings and shift settings.
