The import feature allows you to save time and effort by importing a list of shifts straight into an Event.
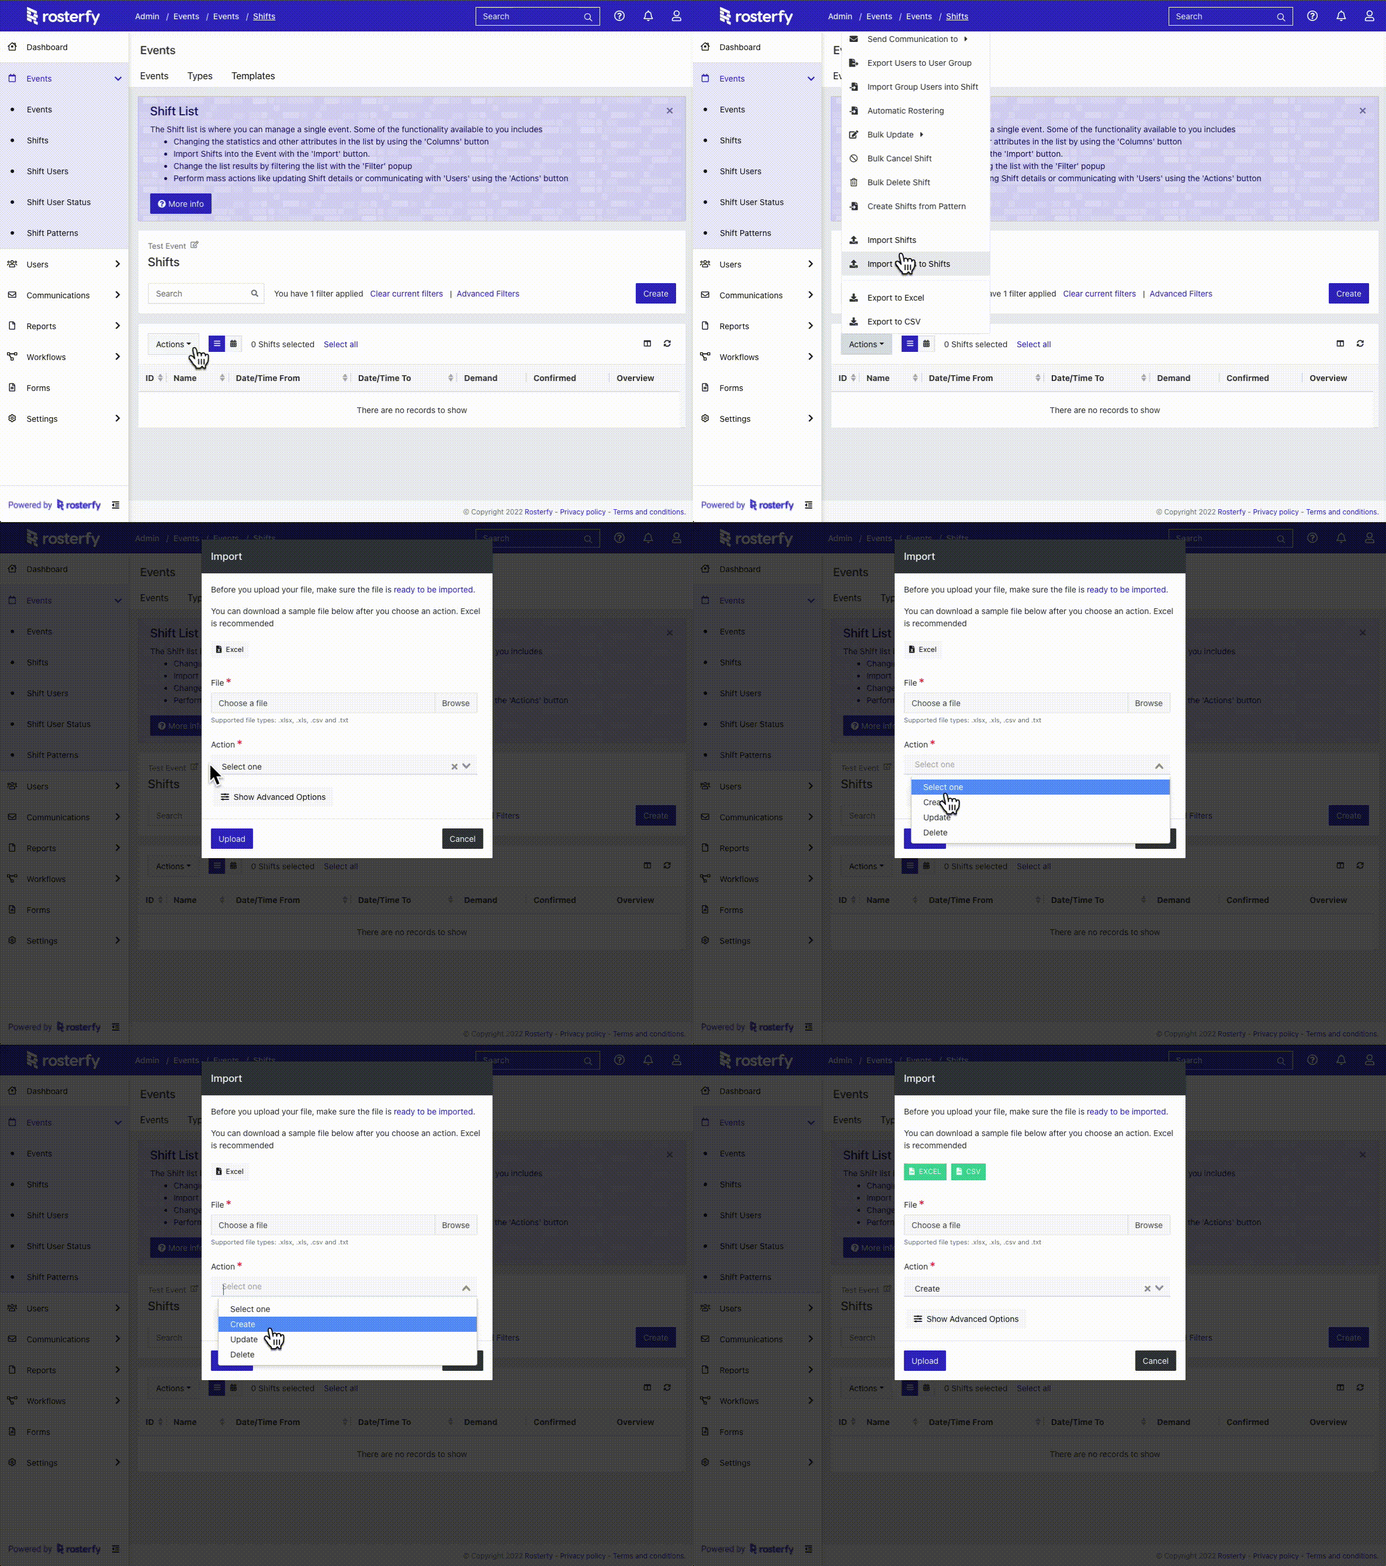
You can find templates for a fresh import sheet from within the Shifts view of your Event via Actions > Shift Import.
Simply select 'Create' for a new item, and select your preferred highlighted Excel or CSV file format.

File Requirements
Our importer has a specific set of validation rules that must be met to successfully complete the import of your file.
Supported file types: .xls, .xlsx, .csv (comma delimited)
Minimum fields required to import shifts
| Column Name | Required Data Type for Import | Example | Note |
| name | Text | Drink Station | Enter the title of your shift in this column. |
| start_timestamp |
Time stamp: Must be date and time dd/mm/yyyy hh:mm:ss am/pm |
2020/04/13 07:00:00 | See Tip below |
| end_timestamp |
Time stamp: Must be date and time yyyy/mm/dd hh:mm:ss am/pm dd/mm/yyyy hh:mm:ss am/pm |
2020/04/13 03:00:00 | See Tip below |
| max_demand | Positive number | 10 |
Enter the number of people required to work this shift in this column. |
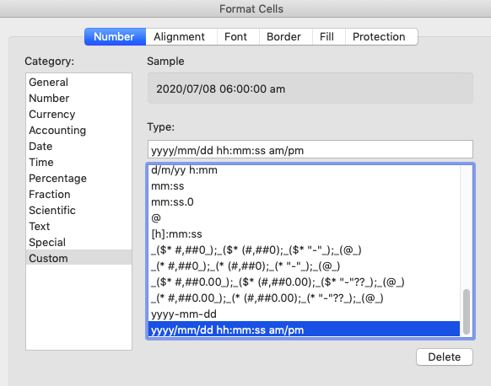
Tip: Format all your cells in excel with the below Custom Number format to ensure they meet the required timestamp rules.
Copy the appropriate format below for when formatting your cell(s):
yyyy/mm/dd hh:mm:ss am/pm
dd/mm/yyyy hh:mm:ss am/pm

Other fields available to import*:
You can import any event shift attribute or custom event shift attribute. Simply find the attribute's code and use it as a heading in the column. For example:
| Column Name | Required Data Type | Example |
| address:street_address_1 | Number or Text | 123 Smith Street |
| address:city | Text | New York City |
| address:postcode | Number or Text | 12343 |
| address:country | 2 character country code |
AU - Australia |
*these fields can be updated within Rosterfy at a later time if required.
Ready to Import
When your file is ready to be imported, find your file and select CREATE only from the action list.

You will then see a sample of your file appear. Double check that your column headers are mapped correctly or chose to ignore a column. You can also select a column header to see all appropriate fields should the correct field not automatically populate.
For best results, ensure there are no blank columns on your sheet.

Once you are comfortable with the Import Mapping stage, you can select Process from the bottom left. You will see progress for the import display, as well as receive an email once complete.
Should any error(s) occur, the emailed report will detail any errors, as well as give an indicator about what caused the error(s).
If you require further assistance with your imports, please submit a support request and include the import file if possible.
