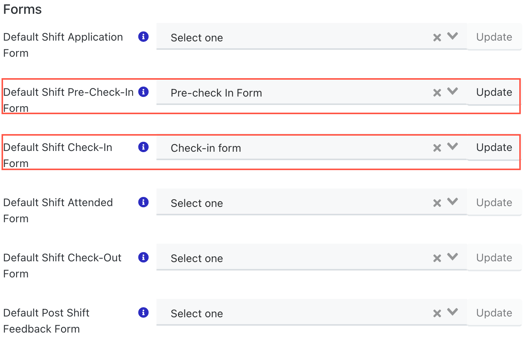
To collect information from users prior to, or during check-in, you can utilise the Pre-check in form and/or Check-in Form.
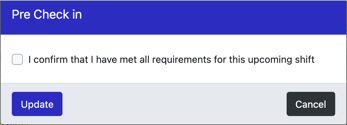
Pre-Check-In Form: Form that must be completed by a user before they are able to self check-in to a Shift (for regular check in, the team leader/administrator will be alerted if the pre-check in form has not been completed by the user).
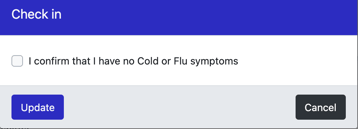
Check-In Form: Form that must be completed at the time of check-in to a Shift. This form can be completed by an administrator, team leader or the candidate during self-check in.
How to Create the Form/s
1. In order to create either of these forms, you will need to navigate to Users > Forms > Create
2. The 'Form Type' will need to be 'Event Shift User Interaction'.
3. Once the form has been created, you can then add any relevant Event Shift User or User Attributes you wish to display on these forms.
Assigning the Forms to an Event/Shift
On an Event level - You can find these settings under the 'Shift Defaults' tab
At a Shift level - You can find these settings under the 'Forms' tab.
Please note - if you are using the 'Self-Check In' functionality, the Check In Form will only be available to candidates during the self-check in window that has been set.
Similarly, the Pre-Check In Form will only be available after the Pre-Check in open time has been set.

Note - At a Shift level - The above can be set up for individual shifts, however, the Pre-Check In/Self Check-In Open time settings are located within the Check In tab.
Completing the Pre Check-In & Check In Forms
From the candidates perspective, they will be prompted to complete the forms within their portal
Pre Check In:


Administrators/Shift Leaders will also be alerted if candidates have not completed the pre-check in form via the timesheet view or shift leader view, and can overwrite this if necessary.

Check In Form:
The Check In Form will appear in the portal when the candidate self checks-in, or when checked in by a team leader / administrator.
