The Rosterfy platform allows you to manage check-in of users to their shifts. There is a few different ways this can be done. This article will focus on the most common which is event and shift leader check-in. For more information about Self Check-In or check-in via and email link without logging in.
There are 3 different 'Leader' types in Rosterfy. Before we dive into how the check-in system works, it is worth quickly going through them. This will make the rest of the article clearer.
- Shift Leader: A user that is assigned as a leader for a shift. This means they have access to check-in/out users only within the shift they have been assigned. They must also be rostered onto this shift
- Event Leader: A leader that is assigned to be leader of an event. This means they have access to check-in/out of users across any shift on the event. They must be rostered onto a shift in the event.
- Team Leader: A user that is marked in the admin console as a team leader can apply from their portal to 'Shift Leader' without any admin assignment. This means they self select when they are shift leader and when they are a regular user.
Shift Leaders
Any user on a shift can be appointed as a shift leader. When viewing a list of users on a shift, a shift leader is indicated by any user with a star next to their name. You can see an example below
![]()
To set a user as a shift leader, you can click More Actions on any user in shift-user list, then Make Leader.
Event Leaders
Any user on an event with a status of pending, confirmed or attended can be appointed as an event leader. When viewing a list of users on a shift, an event leader is indicated by any user with a black star next to their name. You can see an example below

To set a user as an event leader, navigate to Events > Events, click More Actions > Update, under the 'Event Leaders' tab. This is shown below.

Once a user is team leader, they will then be able to check in any user across all shifts on an event. They will also have access to global checkin for events they are an event leader for.
Admin Console Timesheet Management
It is possible to complete the check-in process, as well as review timesheets from the admin console timesheet page. This page is available per event only. You can access the timesheets of any event from the event listing and selecting the View Timesheet option from More Actions.

The timesheet page will present a listing of all users on the event with a shift status of pending, confirmed or attended. The 'Check In', 'Check Out' buttons seen below will only appear if there is a form to be completed. If there is no form, you will be prompted to directly enter a date/time into the column.

On the timesheet page, the following functionality is available
| Control | Function | Description |
| Check In | Check User In | Complete any check-in forms and set a check-in time for the user.This will also give you the option to trigger any check-in automations |
| Check Out | Check User Out | Complete any check-out forms and set a check-out time for the user. This will also give you the option to trigger any check-out automations |
| Edit Check In/Out | Edit the check-in/out times and the forms associated. This will not re-trigger the automations | |
| Create | Add User To Shift/Event | Add a new user to a shift in the event so they can be checked in/out |
| Update | Complete the attended form for this user or delete them from this shift |
It is also possible to update times in bulk. When performing bulk operations, you cannot edit forms associated with check-in/out, and this will not trigger any associated automations. This means selecting many users and adding a check-in time will not give you an option to trigger any check-in automations for these users.
Setup Check-In Forms
It is possible to set a form to be completed at check-in, during a shift, and check-out. These forms can be set per shift and per event, so you can override if needed for a specific shift. These forms will appear in the team leader check in, the self check-in and the timesheet check-in (within the admin console).
Check In/Out/Attended forms can only set as forms that are the 'Event Shift User Interaction' type. When you are setting the forms, you will only see the forms of this type.
To set a form up for either check-in, out and attended, you can navigate to the update page of any event or shift, and find the selections under the settings tab.

If you cannot see these items, you may not have an account with this feature, or you may not have permission to set these settings.
Setup Check-In Attributes
When using the check-in system as a team leader, it may be helpful to have access to user attributes outside of name and profile picture available. This can be done with 'Check In attributes'. You cannot set an admin only attribute to be a check-in attribute though as these attributes are available in the portal and potentially visible to team leaders.
Check-In attributes work just like most event settings, in that you can set them once at an organization level, and then leave them.

Check In Examples
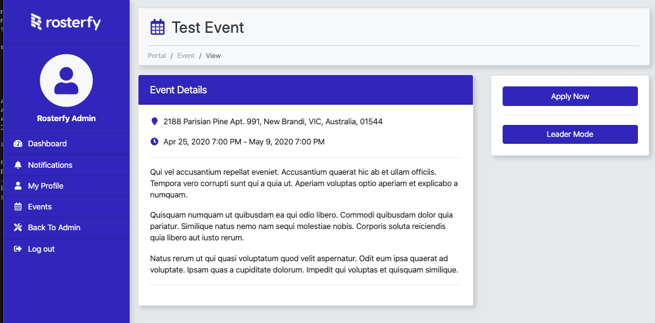
- When a user has been given access to check-in mode as either a Shift or Event leader, the event landing page in the portal will have a new 'Leader Mode' button (this terminology can be modified to suit your organization) to access the check-in system

- In the team leader mode, the user has access to a few controls from the landing page. The user can
- Search for a specific user by their name or ID in the search box
- Click on a shift to view users on that shift
- Set a date filter for the shift list. By default, this will always be the current date, however the user can modify this filter if they need to look at a different date

- Once a user has performed a search, or clicked on a shift, they will see a list of results of users. This list will provide a few controls that have been outlined above.

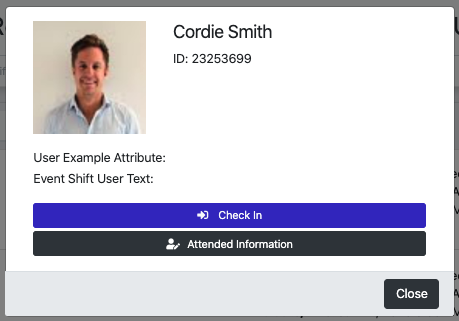
- Clicking on a users name, will open the user check-in attribute pop-up. From this pop-up you can then perform other functions like checking in the user or filling out the attended information form.

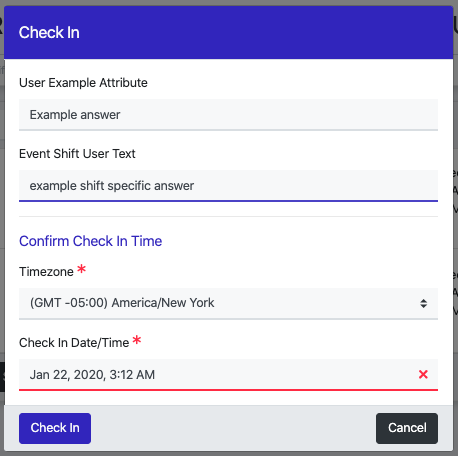
- Clicking the check in, out, or attended information buttons will open a pop-up. By default, just the check-in/out time will be required. If a form has been set on check-in/out then the user will also be required to complete the form

