An Expression of Interest is another way of collecting information from a user before they apply to an Event. It can be useful to allow you to collect information in the preliminary stages that will be relevant for the event but may not necessarily be required for anything outside of that Event.
How it appears on the User side
Before a User can apply to an Event via their dashboard, they must Complete Expression Of Interest (see below in the red box).

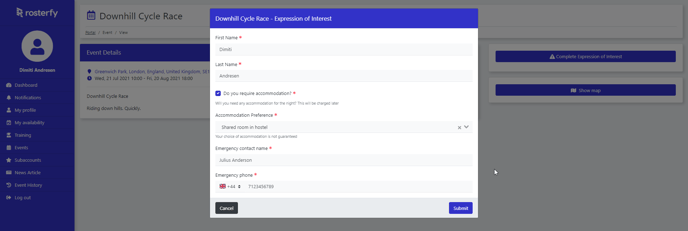
Once the button has been clicked, the form will appear to the user, to be filled out to collect the required information. In the example below, asking the user to confirm some of their details to make sure they're up date, and request some additional information relevant to this specific event. E.g. The User's preference for accommodation.

When the form has been completed, the relevant information has been collected, the User will be able to continue to Apply to the Event.

How to set it up
Create the Attributes that will be used to store the relevant data (More information on attributes can be found in the help articles: Attributes Overview, Available attribute types, Managing Attributes).
To collect the information we use an Event User Interaction Form (more information on the types of forms can be read in the help article: Form Type Overview).
To create the form follow Dashboard > Users > Forms and then click Create (see in the red box below).

When creating the form first name the form in the field next to Name, in the the Type dropdown select Event User Interaction (see in the red box below) and then click Save.

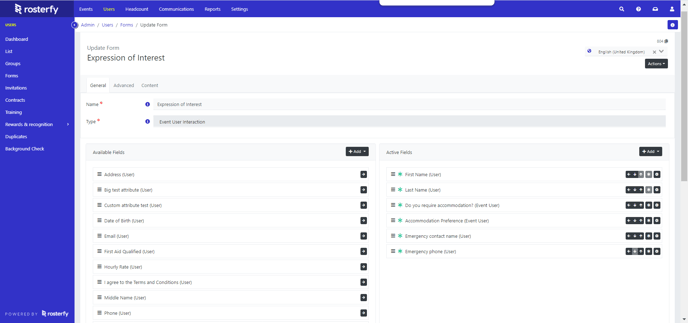
On the left hand side Available Fields will be shown. These are the various attributes that can be moved into the form. On the right hand side there are the Active Fields, and these are the attributes that will be on the form to collect the information required.
The attributes can be clicked and dragged from side to side, as well as up and down for the order on the form.

Once the form is constructed to the requirements, scroll down and click Save (highlighted in red below). This will save the form.

This is the creation of the Expression of Interest form, and the next step is to add it to the Event.
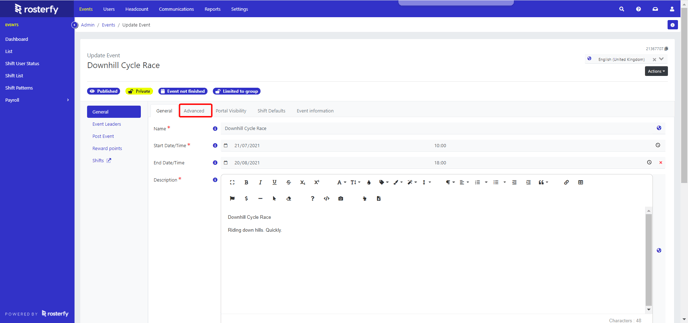
In the Event settings click on the Advanced tab (highlighted below in red).

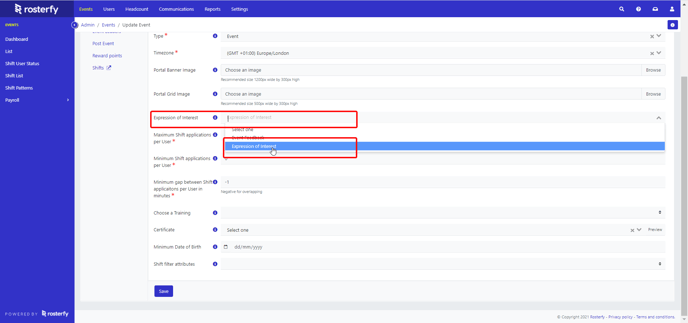
In the Advanced tab, there will be the Expression of Interest drop down field. The drop down will show all forms of the Event User Interaction type, then select the form that has been created for this purpose.
In this example the Expression of Interest form that was created earlier.

Scroll down and click Save and now the Expression of Interest has been set up.
Requiring users to complete the form before they can apply to the Event and for Shifts.
